
CA and ROAs
Create the CA for your registro.br account, link it to registro.br and manage your ROAs.
Who can do this: anyone with View permission on RPKI can view and export. Only the account Manager can create the CA, submit the requests to registro.br, create ROAs, sync and remove.
Step by step
Section titled “Step by step”Create the CA
Section titled “Create the CA”-
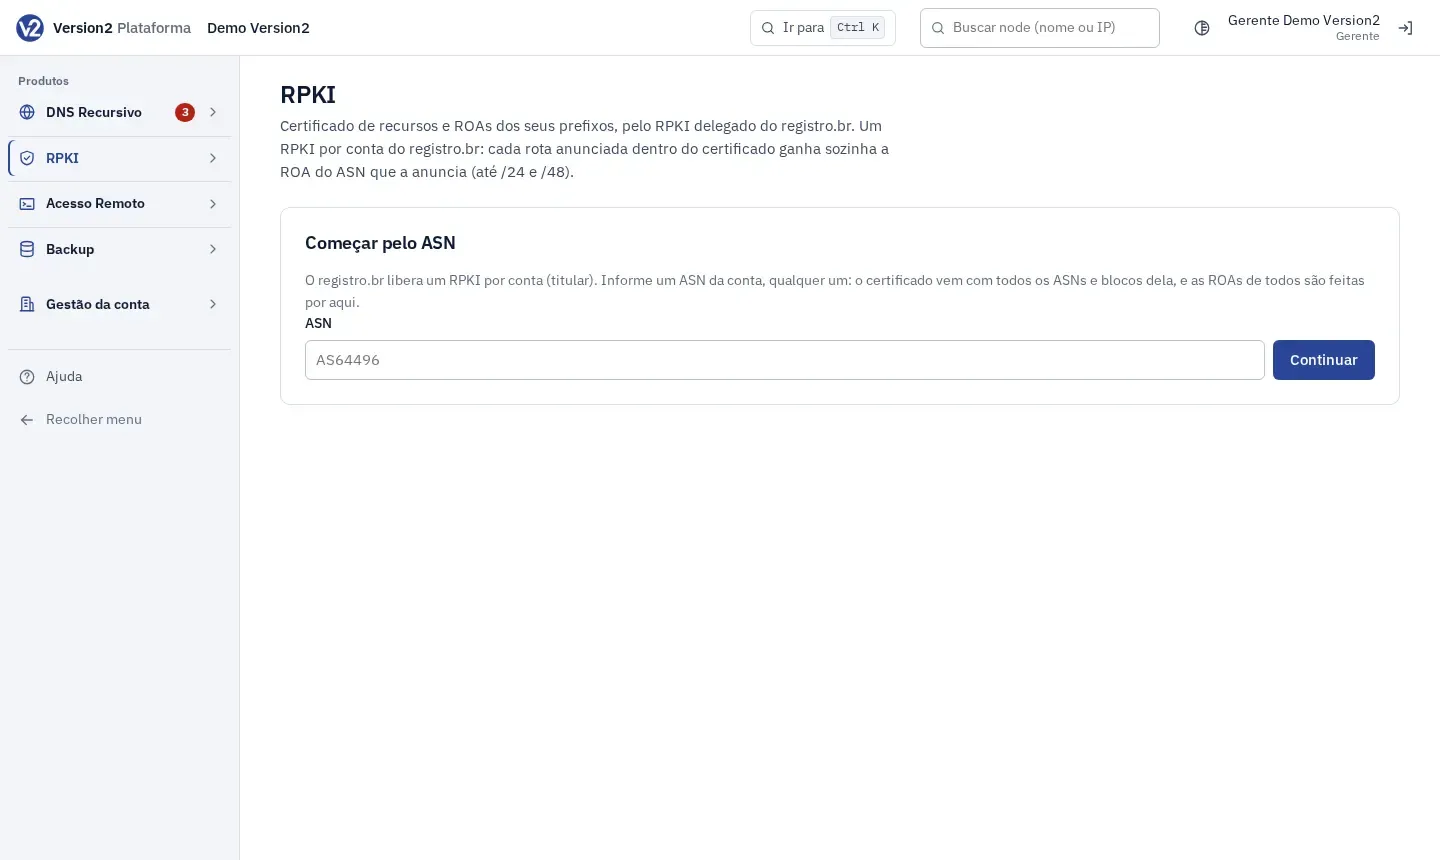
Open CAs e prefixos (CAs and prefixes). Under Começar pelo ASN (Start from the ASN), enter an ASN from the account (e.g. AS64496) and click Continuar (Continue).
-
The dialog shows the prefixes that this ASN announces. Click Criar a CA (Create the CA). The panel opens the account page.
Step 1: enable RPKI at registro.br
Section titled “Step 1: enable RPKI at registro.br”-
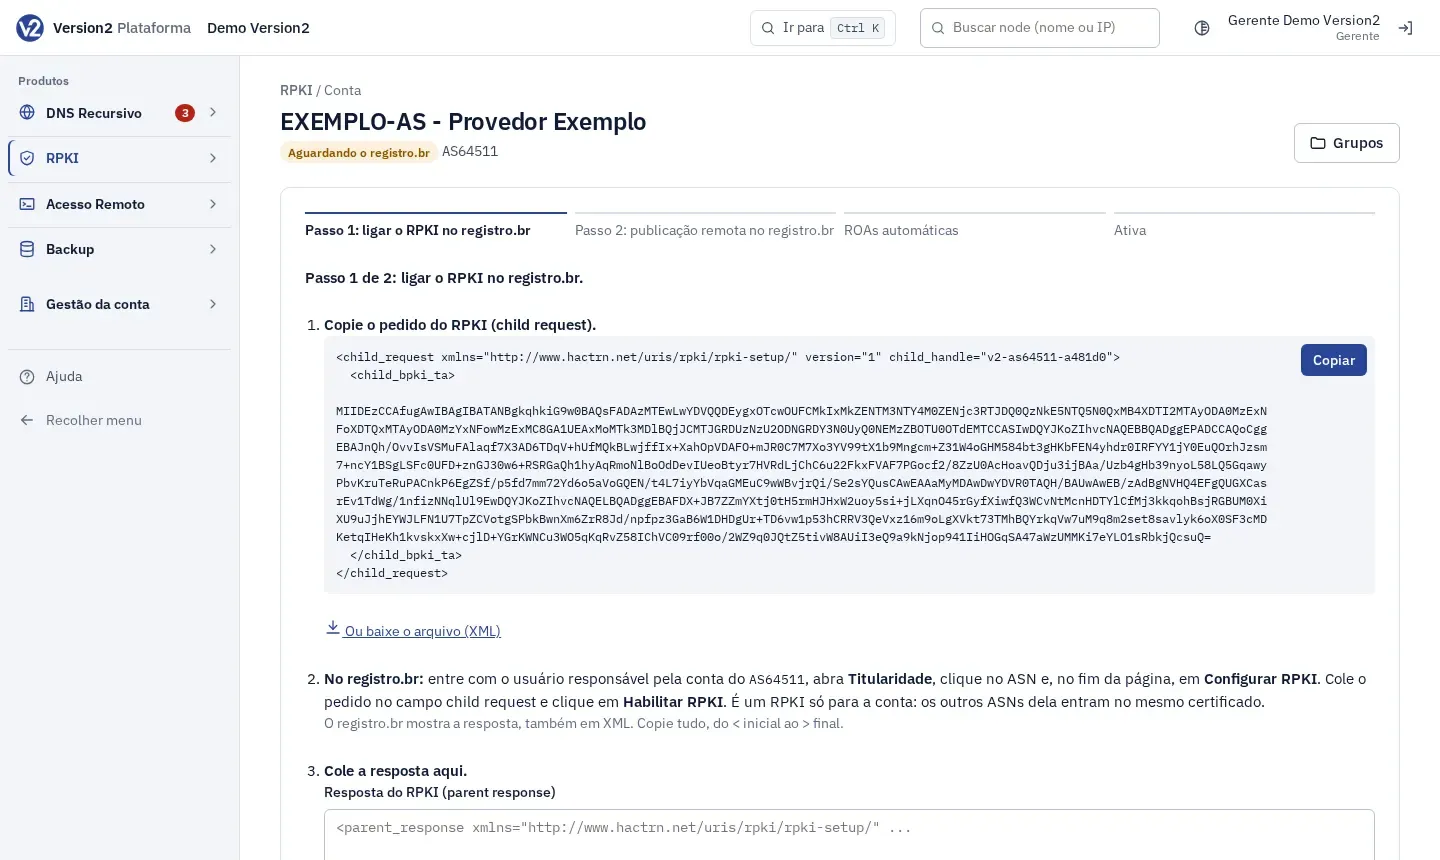
Under Copie o pedido do RPKI (child request) (Copy the RPKI child request), click Copiar (Copy). If you prefer, use Ou baixe o arquivo (XML) (Or download the XML file).
-
At registro.br, sign in with the user responsible for the account, open Titularidade, click the ASN and, at the bottom of the page, click Configurar RPKI. Paste the request into the child request field and click Habilitar RPKI.
-
Copy the XML response that registro.br shows, from the first
<to the last>. -
Back in the panel, paste it into Resposta do RPKI (parent response) (RPKI parent response). The Colar (Paste) button helps. Click Gravar a resposta (Save the response). If you downloaded the file, use Baixou o arquivo? Escolha aqui (Downloaded the file? Choose it here).
-
The account changes to Aguardando o certificado (Waiting for the certificate). The page refreshes on its own while it waits.
Step 2: remote publication
Section titled “Step 2: remote publication”- When Passo 2 de 2: publicação remota no registro.br (Step 2 of 2: remote publication at registro.br) appears, open it and copy the pedido de publicação (publisher request). ROAs already work before this step.
- At registro.br, on the same ASN page, click Configurar publicação remota, paste the request and click Habilitar publicação remota.
- Paste the response into Resposta da publicação (repository response) (repository response) and click Gravar a resposta.
The account page
Section titled “The account page”-
The top shows the status and the number of prefixes in each group. Click a number to filter the table: Com rota inválida (With invalid route), Com rota sem ROA (With route without ROA), Falta publicar (Not yet published), Sem anúncio (Not announced), Protegidos (Protected), IPv4 and IPv6.
-
The tabs are Prefixos (Prefixes), ASNs, Rotas inválidas (Invalid routes), Avisos (Alerts), ROAs feitas à mão (Manual ROAs) and Certificado (Certificate). Each table has search (prefix, IP or ASN), filters, column sorting and 50 rows per page.
-
Exportar CSV (Export CSV) downloads the ROAs. Sincronizar agora (Sync now) updates the data with registro.br right away. Consultar (Look up), next to a block, opens the prefix lookup.
Create a ROA manually
Section titled “Create a ROA manually”Use this for the ASN of a transit customer that announces part of your block, or when you need a different max-length. The automatic check keeps these ROAs in place.
-
Open the ROAs feitas à mão tab. Under Incluir (Add), fill in Prefixo (dentro do certificado) (Prefix, inside the certificate), ASN de origem (Origin ASN, e.g. AS64511), Max-length and Comentário (Comment), and click Incluir na mudança (Add to change). To remove a ROA, check (remover) (remove) in the list.
-
Click Ver prévia (Preview). The preview shows each route, per ASN, Agora (Now) and Depois (After).
-
Click Publicar (Publish). If any route would become invalid, the button changes to Publicar com rotas inválidas (Publish with invalid routes) and asks you to confirm.
Remove the account
Section titled “Remove the account”- On the Certificado tab, click Remover a CA (Remove the CA) and confirm. The ROAs drop out of validators over the next few hours and the routes become “sem ROA” (no ROA). This can’t be undone.
Expected result
Section titled “Expected result”The account reaches Ativa (Active). Routes announced inside the certificate become Protegidas (Protected) by the automatic ROAs and the manual ones.
If something goes wrong
Section titled “If something goes wrong”- “ASN já cadastrado.” (ASN already registered.) or “ASN privado.” (Private ASN.): check the number and use a public ASN from the account that isn’t registered yet.
- “Já coberto pelo certificado do AS…” (Already covered by the certificate of AS…): the account shows as Duplicada (Duplicate) because the ASN already came in the certificate of another registered account. Remove the duplicate entry.
- “Não é a resposta deste passo.” (This is not the response for this step.): the XML you pasted belongs to the other step. The panel tells you where to paste it.
- “Primeiro grave a resposta do RPKI (parent response); a publicação remota vem depois.” (Save the RPKI parent response first; remote publication comes after.): finish step 1 before step 2.
- registro.br rejected the request: follow the guidance shown on the account page. Usually you just redo step 1 with the request shown.
- “A CA ainda não tem prefixos certificados pelo registro.br. As ROAs ficam disponíveis quando o certificado chegar.” (The CA has no prefixes certified by registro.br yet. ROAs become available when the certificate arrives.): check that step 1 was completed at registro.br and wait for the certificate.
- “Nada a publicar: inclua ou marque para remover uma ROA feita à mão.” (Nothing to publish: add a manual ROA or mark one for removal.): add a ROA or mark one for removal before clicking Ver prévia.